

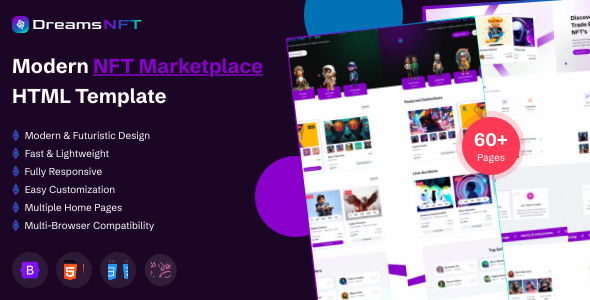
DreamsNFT is a modern, elegant, and fully responsive NFT marketplace template crafted for digital artists, collectors, creators, and Web3 businesses. Built with Next.js (App Router) and TypeScript, it comes with 3 unique homepage layouts and a complete set of pages — creator and collection listings, live auction interfaces, NFT detail pages, activity feeds, blogs, and authentication flows. The template supports both light and dark modes for a seamless experience across all devices. Whether you're building a full NFT marketplace or a creator showcase, DreamsNFT provides all the tools you need in one clean, performance-optimized package.
DreamsNFT is a modern, fully responsive NFT marketplace template built with Next.js and TypeScript. It comes with 3 stunning homepage layouts and a complete set of pages for creators, collections, live auctions, and NFT detail views.
Technical Features
- Built with Next.js (App Router) & TypeScript
- Server & Client Components
- Redux Toolkit for State Management
- Route Groups & Shared Layouts
- Swiper.js for Sliders & Carousels
- Lightbox Gallery Integration (yet-another-react-lightbox)
- Live Auction Countdown Timers
- Responsive Design (Mobile & Tablet Friendly)
- Auth Pages (Sign In, Sign Up, Forgot Password)
Project Overview
The project follows a modular structure with clear separation of concerns.
dreams-nft/
	│
	└── nextjs/
		├── src/
		│	├── app/
		│	│	├── (auth)/
		│	│	├── (home)/
		│	│	├── (public)/
		│	│	│	├── collections/
		│	│	│	├── collection-details/
		│	│	│	├── live-auctions/
		│	│	│	├── activity/
		│	│	│	├── gallery/
		│	│	│	├── seller-grid/
		│	│	│	├── blog-grid/
		│	│	│	└── layout.tsx
		│	│	├── globals.scss
		│	│	├── layout.tsx
		│	│	└── page.tsx
		│	├── components/
		│	│	├── bootstrap-js/
		│	│	├── breadcrumb/
		│	│	├── common-footer/
		│	│	├── common-header/
		│	│	├── common-lightbox/
		│	│	├── common-select/
		│	│	├── common-date-picker/
		│	│	├── filter-offcanvas/
		│	│	├── heart-icon/
		│	│	├── image-with-base-path/
		│	│	├── password-input/
		│	│	└── scroll-to-top/
		│	├── config/
		│	│	└── metadata.ts
		│	├── core/
		│	│	├── data/
		│	│	├── json/
		│	│	└── store/
		│	├── hooks/
		│	│	└── useFancybox.tsx
		│	├── view/
		│	│	├── home-pages/
		│	│	├── collections-pages/
		│	│	├── blogs-page/
		│	│	├── pages/
		│	│	└── auth/
		│	├── routes/
		│	│	└── all_routes.tsx
		│	├── style/
		│	│	├── css/
		│	│	├── scss/
		│	│	└── icons/
		│	├── types/
		│	├── utils/
		│	│	└── fancyboxUtils.ts
		│	└── environment.tsx
		├── next.config.ts
		├── next-env.d.ts
		├── package.json
		├── tsconfig.json
		└── eslint.config.mjs
Structure Overview
DreamsNFT Next.js uses the App Router with route groups, shared layouts, and a Redux Store Provider to keep the app scalable and maintainable.
The root layout in src/app/layout.tsx wraps the entire app with the Redux StoreProvider, global styles, and font links.
Below is the Next.js root layout structure:
import type { Metadata } from "next";
import { getPageMetadata } from "@/config/metadata";
import StoreProvider from "@/core/store/StoreProvider";
import "bootstrap/dist/css/bootstrap.min.css";
import "../style/icons/lucide/lucide.css";
import "./globals.scss";

export const metadata: Metadata = getPageMetadata("home");

export default function RootLayout({
  children,
}: Readonly<{ children: React.ReactNode }>) {
  return (
    <html lang="en">
      <body>
        <StoreProvider>{children}</StoreProvider>
      </body>
    </html>
  );
}Prerequisites
Node.js Installation
Ensure that Node.js is installed and running on your system.
https://nodejs.org/en/download/
Package Manager
Use npm (recommended with this project lockfile) or Yarn if preferred.
npm -vNext.js
Next.js is the framework powering this project. It is installed automatically as a project dependency — no global installation required.
https://nextjs.org/
Installation Steps
Extract & Navigate
After downloading, extract the DreamsNFT package and navigate to the nextjs directory.
Install Dependencies
npm installThis command will install all required dependencies into the node_modules directory.
Start Development Server
npm run devStarts the Next.js development server with Fast Refresh. Changes to components, styles, and TypeScript modules are reflected instantly in the browser.
Open in Browser
Open your browser at the URL shown in the terminal (typically http://localhost:3000/)
Build
Run the build command to generate the production-ready output in the .next directory:
npm run buildDeployment
Deploy the .next folder contents to your web server. The build output contains all compiled pages, optimized CSS, minified JavaScript, and vendor libraries ready for production.
You can change the logo in your Next.js project by following these steps:
- Replace the Logo Image:
- Place your new logo image (e.g.,
logo.svgorlogo.png) in thepublic/assets/img/folder.
- Place your new logo image (e.g.,
- Update the Logo Usage in Your Component:
- Open the component where the logo is used (commonly
src/components/common-header/). - Update the
ImageWithBasePathsrcto point to your new logo file. For example:
<ImageWithBasePath src="assets/img/logo.svg" alt="logo" /> - Open the component where the logo is used (commonly
- Save and View Changes:
- Save the file and check your app in the browser. The new logo should appear in place of the old one.
- You can use
.svg,.png, or.jpgfiles for your logo. - For best results, use an optimized SVG for scalability and crispness.
The default font is Schibsted Grotesk. To change the font:
Update the Google Fonts <link> in src/app/layout.tsx and the $font-family-primary variable in src/style/scss/_variables.scss:
@import url('https://fonts.googleapis.com/css2?family=Schibsted+Grotesk:ital,wght@0,400..900;1,400..900&display=swap');

// Font Family
$font-family-primary: "Schibsted Grotesk", sans-serif;The design token variables are defined in src/style/scss/_variables.scss. Here are the primary color tokens:
--primary: #8A00CB;
--secondary: #0072B5;
--success: #09800F;
--info: #1976D2;
--warning: #FDAF22;
--danger: #FD3A55;
Background Color Change
You can change the header background color in _variables.scss as per your wish.
--primary: #E3FF10;
--secondary: #1B252A;DreamsNFT is developed by Dreams Technologies and is available under both Envato Extended & Regular License options.
Regular License
Usage by either yourself or a single client is permitted for a single end product, provided that end users are not subject to any charges.
Extended License
For use by you or one client in a single end product for which end users may be charged.
What are the main differences between the Regular License and the Extended License?
If you operate as a freelancer or agency, you have the option to acquire the Extended License, which permits you to utilize the item across multiple projects on behalf of your clients.
| NAME | URL |
|---|---|
| Next.js | https://nextjs.org/ |
| React | https://react.dev/ |
| TypeScript | https://www.typescriptlang.org/ |
| Redux Toolkit | https://redux-toolkit.js.org/ |
| Bootstrap | https://getbootstrap.com/ |
| Swiper.js | https://swiperjs.com/ |
| yet-another-react-lightbox | https://yet-another-react-lightbox.com/ |
| Prime React | https://www.npmjs.com/package/primereact |
| Lucide Icons | https://lucide.dev/ |
| Fontawesome | https://fontawesome.com/ |
| Google Fonts | https://fonts.google.com/ |
Need Support?
If this documentation does not address your questions, please feel free to contact us via email at support@dreamstechnologies.com
Reach the team at GMT+5:30. Typical reply within 12–24 hours on weekdays — rarely up to 48 hrs during holidays. Support is available to verified buyers for template-related issues.
Contact SupportImportant Note : We strive to offer top-notch support, but it's only available to verified buyers and for template-related issues such as bugs and errors. Custom changes and third-party module setups are not covered.
Do you need a customized application for your business?
If you need a customized application for your business depends on your specific requirements and goals, Please contact us. Customization can be the key to success, ensuring your project perfectly aligns with your unique goals and requirements.
Don't Miss Out on the Benefits of Customization!
Unlock the potential of your project. It's time to ensure your project isn't another cookie-cutter solution but truly unique and effective one.
Discover how customization can make a difference in your project's success. Let's create a solution that's as unique as your vision!
We'll tailor the application to meet your specific needs and preferences.
We will upload your website to the server and ensure it is live.

Thank You
Thank you once again for downloading DreamsNFT.
We hope you're enjoying your experience, and we kindly request that you take a moment to share your valuable review and rating with us.